Web cookies (also called HTTP cookies, browser cookies, or simply cookies) are small pieces of data that websites store on your device (computer, phone, etc.) through your web browser. They are used to remember information about you and your interactions with the site.
Purpose of Cookies:
Session Management:
Keeping you logged in
Remembering items in a shopping cart
Saving language or theme preferences
Personalization:
Tailoring content or ads based on your previous activity
Tracking & Analytics:
Monitoring browsing behavior for analytics or marketing purposes
Types of Cookies:
Session Cookies:
Temporary; deleted when you close your browser
Used for things like keeping you logged in during a single session
Persistent Cookies:
Stored on your device until they expire or are manually deleted
Used for remembering login credentials, settings, etc.
First-Party Cookies:
Set by the website you're visiting directly
Third-Party Cookies:
Set by other domains (usually advertisers) embedded in the website
Commonly used for tracking across multiple sites
Authentication cookies are a special type of web cookie used to identify and verify a user after they log in to a website or web application.
What They Do:
Once you log in to a site, the server creates an authentication cookie and sends it to your browser. This cookie:
Proves to the website that you're logged in
Prevents you from having to log in again on every page you visit
Can persist across sessions if you select "Remember me"
What's Inside an Authentication Cookie?
Typically, it contains:
A unique session ID (not your actual password)
Optional metadata (e.g., expiration time, security flags)
Analytics cookies are cookies used to collect data about how visitors interact with a website. Their primary purpose is to help website owners understand and improve user experience by analyzing things like:
How users navigate the site
Which pages are most/least visited
How long users stay on each page
What device, browser, or location the user is from
What They Track:
Some examples of data analytics cookies may collect:
Page views and time spent on pages
Click paths (how users move from page to page)
Bounce rate (users who leave without interacting)
User demographics (location, language, device)
Referring websites (how users arrived at the site)
Here’s how you can disable cookies in common browsers:
1. Google Chrome
Open Chrome and click the three vertical dots in the top-right corner.
Go to Settings > Privacy and security > Cookies and other site data.
Choose your preferred option:
Block all cookies (not recommended, can break most websites).
Block third-party cookies (can block ads and tracking cookies).
2. Mozilla Firefox
Open Firefox and click the three horizontal lines in the top-right corner.
Go to Settings > Privacy & Security.
Under the Enhanced Tracking Protection section, choose Strict to block most cookies or Custom to manually choose which cookies to block.
3. Safari
Open Safari and click Safari in the top-left corner of the screen.
Go to Preferences > Privacy.
Check Block all cookies to stop all cookies, or select options to block third-party cookies.
4. Microsoft Edge
Open Edge and click the three horizontal dots in the top-right corner.
Go to Settings > Privacy, search, and services > Cookies and site permissions.
Select your cookie settings from there, including blocking all cookies or blocking third-party cookies.
5. On Mobile (iOS/Android)
For Safari on iOS: Go to Settings > Safari > Privacy & Security > Block All Cookies.
For Chrome on Android: Open the app, tap the three dots, go to Settings > Privacy and security > Cookies.
Be Aware:
Disabling cookies can make your online experience more difficult. Some websites may not load properly, or you may be logged out frequently. Also, certain features may not work as expected.
In fact, many of the skills you will want to teach your child have two or more parts. When teaching a new skill, you should think carefully about what is involved in the skill. Once you have thought about it, you can break the skill down into a series of steps. It is often easiest to teach only one new step at a time. Breaking skills down is especially important when teaching self-help routines like dressing or tooth-brushing that have many steps. Identifying all the steps in a task like these is called “task analysis.”
We will not show you how to teach many routines like this in this program. However, we want to briefly explain how to break skills down, so you can try it for yourself. There is also a lot of information on the internet. For example, you could look up “task analysis tooth brushing” or “task analysis put on pants” if you are interested in reading more on this topic.
To figure out the small steps that make up the skill or behavior you want to teach, do the behavior yourself very slowly. While doing the behavior, think about all the steps. The breaking down of skills into a series of smaller steps is called “task analysis.” That’s because the job of task analysis is to understand all the steps in a task, and then teach them, one at a time. Some tasks are easier to teach by chaining the steps in a forward direction. In other words, the same order you would do it in real life. This is sometimes called forward chaining.
For example, with tooth brushing, you could teach the child to get his toothbrush case. Do this by fading your prompts on this step first and reinforcing the child for his increasing independence. Until this first step is learned, you would prompt the rest of the steps as you go along. After the child is independent at getting his toothbrush case, you would work on the next step of opening the toothbrush case. You would save the reinforcer until after these first two steps are finished and so on.
Other tasks may be easier to teach using a backward chain. For example, with putting on pants that have an elastic waist, you would just do the steps yourself all the way through until the very last step. You would prompt your child to pull his pants up the last few inches, using a hand-over-hand prompt if needed. Then you can begin to fade your prompts. First you would fade your prompt on this very last step of pulling the pants from the hips up to the waist.
Praise and reward the child for having finished the task of putting on his pants. Once that step is learned, you would work on pulling pants up from the knees. You can start each step with a hand-over-hand prompt if needed, and then give less help until the child can do this by himself. Even if he needs a hand over hand prompt, you would reinforce him for pulling up his pants from the knees with praise and/or a little treat. You continue to work through the steps of the routine in this way until the child can do all of the steps by himself.
There are many places on the Internet that explain how to teach your child multi-step skills like these. These will give you a basic introduction to these teaching methods. Look up the terms “task analysis” or “task analysis and chaining.” You can also search “task analysis for tooth-brushing” or “task analysis for washing face” etc. You should be able to find many examples and instructions. You will also find some video clips that show how to do this. However, doing task analysis well will require some skill. If you have a behavior analyst working with your child, he or she should be able to show you how to teach many routines. If not, try to keep the multi-step skills as simple as possible. Use as few steps as possible, and don’t teach more than one step and one skill at a time.
Here is some more detailed information about ways to track behavior and mastery.
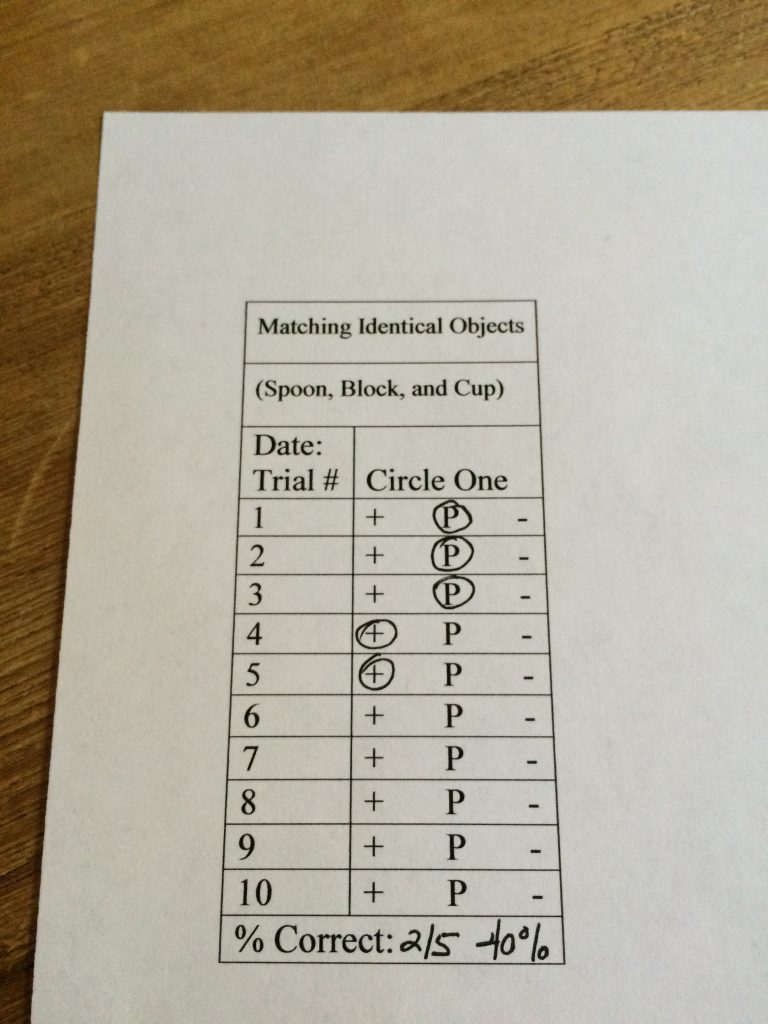
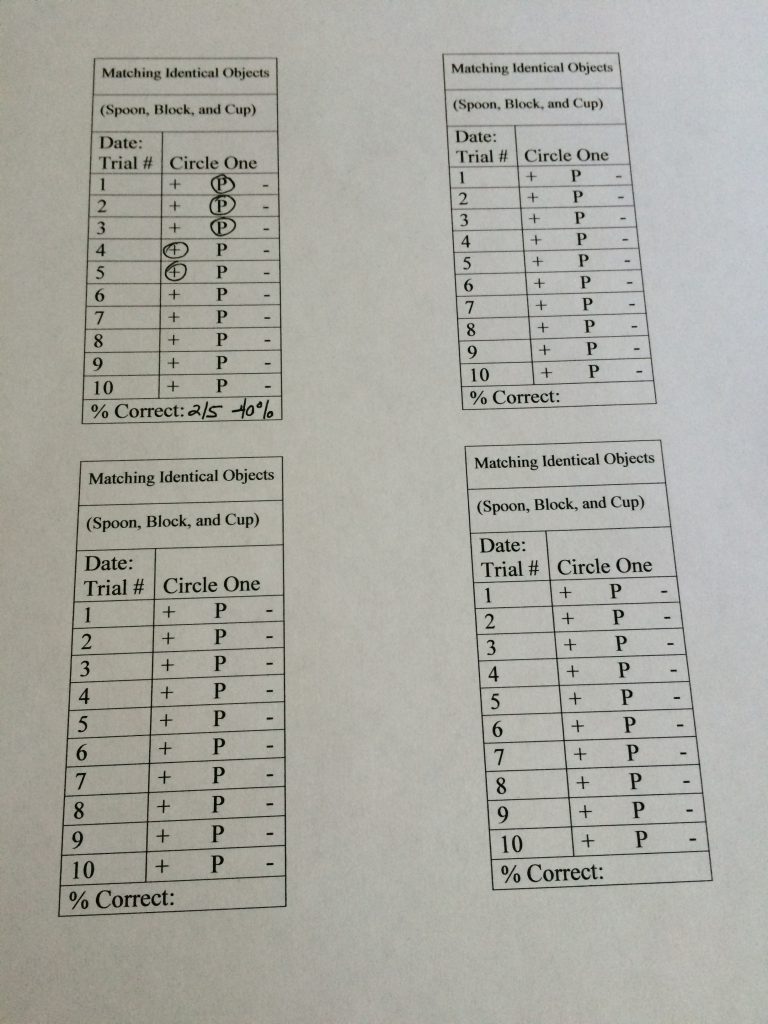
You can also make up a simple record-keeping form. Here is one type of simple record-keeping form. Using this form, you would just circle either +, P or –.
Date
Circle One
Trial #
1
+ P –
2
+ P –
3
+ P –
4
+ P –
5
+ P –
6
+ P –
7
+ P –
8
+ P –
9
+ P –
10
+ P –
Percent Correct
Here’s another idea. Using the following record-keeping form, you simply write in +, P or –
Date
Score
Trial #
+, P, or –
1
2
3
4
5
6
7
8
9
10
# Correct
You could use whichever type of form seems easiest to you.
Keeping track of your child’s learning, and knowing when she has mastered a skill, is the best way to know whether or not it is time to move on and add a new skill or a next step. Without any data, it is difficult to be sure whether or not a child has mastered a skill. Finding a friend or relative to help out, or trying to track your child’s progress by yourself, will help you make good decisions about whether or not your child is ready to move on to the next step. Doing this even one or two times per week for each of the new skills you are teaching may be good enough record-keeping to make good decisions about your teaching. It’s certainly better than not doing it at all.
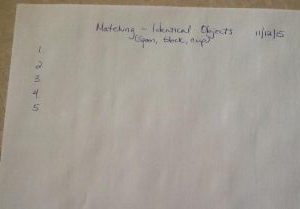
Let’s practice for a few minutes now. Please get a piece of paper and a pencil. When you have your paper and pencil, write the numbers 1 to 5 down the left hand-side of the paper like this.
1.
2.
3.
4.
5.
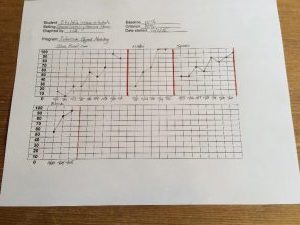
We’re going to show you a series of 5 learning trials for teaching matching of identical objects so you should right “Matching – Identical Objects” at the top of the sheet of paper. And just to get into the habit, you should add today’s date near the top of the page as well. Keeping track of your special learning session dates is a good thing to do. If you are working with a Board Certified Behavior Analyst (BCBA) he or she will want to graph your child’s data by date for each teaching program. This makes it very easy to see at a glance how well your child is learning.
Even if you do not the graph the data, you should try to keep it in a file or binder by date. Keep the data for each teaching program in a separate section. That way, you can look back and see how your child did at various points in time learning new skills.
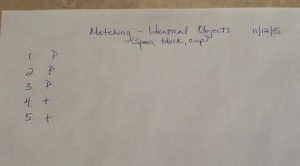
Now we’re going to show you a video clip of 5 learning trials. See if you can record a plus sign (+) for correct, a minus sign (–) for incorrect or no response, or a “P for prompt” next to the number for each learning trial.
Here’s how this data would look on the handwritten data sheet we showed you above.
Here’s how it would be recorded on the record-keeping charts we showed you.
Matching Identical Objects
(Spoon, block, and Cup)
Date: 11/12/15
Score
Trial #
+, P, or –
1
P
2
P
3
P
4
+
5
+
6
7
8
9
10
Percent Correct
2/5 or 40%
Here’s how it would be recorded on the record-keeping charts we showed you.
Matching Identical Objects
(Spoon, block, and Cup)
The percent (%) correct equals the number of trials scored with a plus sign (+) in this case 2, divided by the total number of trials presented (in this case 5) so 2 / 5 = .4 or 40%. If the child had scored a plus sign on 3 out of the 5 trials, she would have been 60% correct, 4 out of 5 would be 80% correct and if she had responded correctly, and without any help, on all 5 trials, you would have a % correct score of 5/5 or 100%.
Now let’s say that after two or three weeks, your child is consistently matching identical spoons, blocks and cups correctly, at least 8 times out of every 10 trials, when presented in an unpredictable order. At that time, you could say that your child has mastered identical object matching for spoons, blocks and cups up at the 80% mastery criterion you set for her. Once your child is scoring at the mastery criterion you have set for her and she does so at least 3 times in a row over a period of at least 2 days, you would be ready to add a fourth pair of matched objects into the mix. It would be a good idea to start a list for the mastered items in each teaching program. For example, you would write:
Matching Identical Objects
Mastered Items
Spoons
Blocks
Cups
Once your child has mastered his first set of three items, you would then add another item, for example, “cars.” In this case, your new record-keeping form for the teaching program called, Matching Identical Objects, would look like this.
Matching Identical Objects
(Cars)
Date:
Score
Trial #
+, P, or –
1
2
3
4
5
6
7
8
9
10
Percent Correct
2/5 or 40%
Even though you would be asking your child to match identical pairs of spoons, blocks, cups and cars, you would only need to keep careful track of the new one, “cars.” And, of course, in the beginning, we would expect that most of the “match cars” trials would be prompted, while most, if not all, of the spoon, block and cup trials would be independent and correct. Since you wouldn’t need to record your child’s performance on spoons, blocks, and cups, his record-keeping chart might look something like this:
Matching Identical Objects
(Cars)
Date: 11/12/15
Score
Trial #
+, P, or –
1
P
2
P
3
–
4
P
5
P
6
+
7
8
9
10
Percent Correct
1/6 or 17%
This record-keeping chart tells you that you worked on the teaching program for Matching Identical Objects on November 12, 2015. You would know that your child’s new object pair to match was a pair of cars and that she was prompted 4 out of the 6 times that you practiced this match. By looking at this data sheet, you would also have a list of the mastered items in this teaching program, you would know that “match cars” was not really presented six times in a row, by itself. Instead, you would understand that “match cars” was presented along with the other three mastered items (spoons, blocks and cups) in an unpredictable order.
Although you would not know exactly how many trials of matching your child did altogether during that sitting, you would know that she failed to match the pair of cars correctly on the first probe (test trial) but that she matched the pair of cars correctly the second time you withheld your prompt. And, by the way, if your child makes an error on the very last trial of a set of trials, you should add one more trial and prompt it to be sure the trial set for that teaching program ends on a positive note. Her percent correct is 16.66 percent but we would round that to 17%.
You would continue to keep track of your child’s performance on “match cars” until he was doing this correctly at least 8 times out of every 10 trials, at which point, you could add cars to the list of mastered items in the teaching program called, Matching Identical Objects.
Matching Identical Objects
Mastered Items
Spoons
Blocks
Cups
Cars
Then you would add another new item and you would keep track of your child’s performance on that new item, and so on.
Now let’s try to practice record-keeping again. Watch the following clip of the same child learning to follow a new instruction, “walk around chair.” This child has already mastered clap and arms up and responds correctly when given those instructions nearly 100% of the time. He is learning his new instruction, mixed in with trials of the previously mastered instructions (clap and arms up). So remember, you only need to take data on trials of the new instruction (walk around chair).
Begin by writing the numbers 1-10 down the left side of your piece of paper and write “Following Instructions” (walk around chair) and today’s date across the top. Then watch the following clip and write a P, + or – for each trial of ‘walk around chair’.
Here’s how the scores would look if you had recorded them on a record-keeping chart.
Following Instructions
(Walk around chair)
Date: xx/xx/xx
Score
Trial #
+, P, or –
1
P
2
P
3
P
4
P
5
–
6
P
7
P
8
P
9
+
10
Percent Correct
1/9 or 10%
This record-keeping chart gives us a lot of information. It shows us that on (today’s date) there were 9 trials of “walk around chair” done in the teaching program called, Following Instructions. The first four trials were prompted. On the fifth trial, the teacher withheld the prompt to see if the child would respond correctly without help. He responded incorrectly on that trial. She then prompted three more trials of walk around chair, mixed in with his mastered instructions. On the ninth trial, she probed again (withheld her prompt) and he scored correctly. Ending on a positive note, she stopped there. So, altogether, for that set of trials, there were 9 trials of ‘walk around chair’ and 1 out of the 9 trials was independent and correct so he was approximately 10% correct.
How accurate were you with your record-keeping? Did you score the learning trials the same way? If not, you might want to go back over this part a couple of times before moving on.
Making up your record-keeping charts (data sheets) ahead of time will make it easier to record your child’s progress. As you have seen, data sheets can be very simple and easy to make. It really is a good idea to try to keep track of your child’s responses for each skill you are working on with her as often as you can, even if that’s only one or two times per week.
We’ve used the phrase ‘learning trial’ many times – now we’ll explain what that really means. In fact, we’re going to tell you a little bit about the ABC’s of behavioral teaching. This kind of highly structured teaching is called Discrete Trial Training (DTT) or sometimes Discrete Trial Instruction (DTI). In DTT, a learning “trial” has three main parts, A, B and C.
A = Antecedent
B = Behavior
C = Consequence
The antecedent (A) is letting the child know what she is supposed to do. As we have said before, sometimes this does not require words while at other times it does. For example, when teaching a child to request, you can just hold something you think she’ll want where she can see it but a little out of her reach; whereas when teaching a child to imitate, you do the action yourself and say, “Do this”.
At first, a prompt (P) is often needed to let the child know what to do and how to do it. The prompt also helps to make sure that the child follows the instruction.
P
↓
A → B → C
The second part of a learning trial is the child’s response or the “behavior” (B) she engages in following the antecedent (A). A child can respond correctly with a prompt (P), correctly all by herself (+), or incorrectly (–). Or, in some cases, she may give no response at all, even after you have given her plenty of time to respond. The third part of the learning trial is what happens just after the child’s response, like the reward she receives when she responds correctly. This is called the Consequence (C) because what you do directly after the child’s response should be “contingent upon” (depend on) her response/behavior (B). In other words, what YOU do, directly after your child responds to your instruction, should be a direct consequence of your child’s response.
Identifying the ABC’s of a Teaching Trial
Now let’s look at a clip of a single learning trial and see if you can pick out the three parts; the Antecedent, Behavior and Consequence. If there is a prompt, what kind of prompt is used? And what is the skill being taught?
Antecedent: Teacher places a cup, a block and a spoon on the table. Each is placed in the center of a paper plate. She holds up a picture of a cup and says, “cup” and then hands the child the picture.
↓
Prompt: The teacher points to the cup without touching it and also looks at it.
↓
Behavior: The child places the picture of the cup on the cup.
↓
Consequence: The teacher reinforces the correct, prompted response. The reinforcer for this trial is praise, (“That’s the cup. Good job,”) followed by a small piece of a cookie. She puts the piece of cookie in his hand immediately after she praises him.
Skill being taught is Object to Picture Matching
Let’s look at another trial of the same teaching program (object to picture matching).
Antecedent: Teacher places a cup, a block and a spoon on the table. Each is placed in the center of a paper plate. She holds up a picture of a spoon and says, “Spoon” and then hands the child the picture.
↓
Prompt: The teacher points to the spoon without touching it and also looks at it.
↓
Behavior: The child places the picture of the spoon on the spoon.
↓
Consequence: The teacher reinforcesthe correct, prompted response. The reinforcer for this trial is praise (“That’s the spoon. You did it. Good job.”) paired with a little tickle.
Determining How Much Time to Spend in Learning Sessions
You might be wondering how many learning sessions your child should have each day and how long they should last. Actually, there’s no simple answer to this question. First, it depends on the age of the child (younger children will usually have less patience and ability to pay attention). It also depends on the individual child’s ability to sit and learn; two children of the same age may have very different needs. One may be much more active and may find it difficult to sit. Such children may not be able to pay attention to an activity for very long; while another may already enjoy activities such as looking at books or making puzzles with a parent.
In the beginning, getting your child to sit and focus for 30 seconds can count as a success. So a learning session could be 5 sittings of 30 seconds each, with one minute play break in between each sitting. So the total of 2 minutes and 30 seconds of sitting and 4 minutes of playing could add up to a learning session that is under 10 minutes. Another child may be able to begin with 5 sittings of 3 minutes each, for a total of about 15 minutes of learning trials per session. If you add 4 minutes of play break time (1 minute between trial sets) that child’s learning sessions would last about 20 minutes each (including the short play breaks after each set of teaching trials).
In any case, try not to ask your child to sit still and pay attention to you for longer than you feel reasonably confident she can and will. It’s fine to have your child sit and work with you for just 5 or 10 trials at a time. Then you can give her a little play break for about a minute, and then have another short sitting of 5 or 10 more trials, and so on. If your child is learning to complete a puzzle and to string beads, to imitate your actions, to match identical objects, and to follow instructions without objects, a typical session/lesson plan might look like this:
Complete a 5 piece puzzle (Begin with two pieces already in the puzzle board so that she must place 3 pieces to complete the puzzle.)
Play Break (Play with balloon for 1 minute.)
8 Trials of Motor Imitation (Child has mastered clap, arms up, stomp feet, stand up, sit down and tap table. New action is turn around in a circle.)
Play Break (Bounce on big ball for 1 minute.)
String 5 beads.
Play Break (Blow and chase bubbles for 1 minute).
8 Trials of Matching Identical Objects (Car, bowl, and shoe)
Play Break (Play with Helicopter Toy)
5 Trials of Receptive Commands (Following Instructions without Objects) (Child has mastered clap, arms up and stomp feet. New instruction is, “Stand up”.)
Learning session (approximately 10 minutes long) is finished! Go outside and play on the swing!
Be Sure to Vary the Order of Teaching Programs from Session to Session
You should be careful to change the order of the teaching programs from session to session so that your child does not come to expect a very specific sequence and become upset when you change things around. For example, the next time you do a similar session with the same teaching programs, you could do the beads first, the matching second, the puzzle third, following instructions without objects fourth, and imitation last. The order itself doesn’t matter; it’s just important that it is different each time
How to Increase the Time Spent in Learning Sessions
As your child gets used to sitting and doing what you ask her to do, you should increase the time you spend in learning sessions, by increasing the number of trials in each teaching program and also the number of teaching programs in each learning session. Remember though, that you will probably need to do this very gradually at first. So, for example, once a child is cooperating well with about 5 teaching programs, for example, puzzle, beads, imitation, matching, and receptive commands (following instructions without objects) you could begin to require just a little more in each set of trials. Here is an example of what you might try next.
10 Trials of Motor Imitation (Child has mastered clap, arms up, stomp feet, stand up, sit down, tap table and turn around in a circle. New action is jump.)
Play Break (Blow and chase bubbles.)
Complete 5 piece puzzle (Begin with all pieces out of the puzzle board so that she must place all 5 pieces to complete the puzzle.)
Play Break (Play with toy cars.)
10 Trials of Matching (Car, bowl, and shoe are mastered. New item is mitten.)
Play Break (Play with pig popper toy.)
8 Trials of Receptive Commands (Following Instructions without Objects) (Child has mastered clap, arms up, stomp feet and stand up. New instruction is, “sit down”.)
Play Break (Play with tops.)
String 6 beads.
Learning session (approximately 12 minutes) is finished. Snuggle and watch a favorite video or go for a walk!
Of course, all of these are just suggestions. The amount of time you spend in learning sessions will also depend on how quickly your child is learning from the natural environment. In other words, you should try to gauge how much your child is learning, just by being included in the family and neighborhood activities. If your child is learning well from the home and neighborhood, you won’t need to spend so much time in these learning sessions. However, if your child is learning slowly from the natural environment, and you want to give her some extra help, try to plan more time for learning sessions.
Either way, the amount of time you spend in your learning sessions will also depend on your child’s attention span. Some children will be able to increase their daily learning session time up to a total of about 3 hours, broken up across several sessions (for example, 3 or 4 sessions of 45 minutes to one hour each). And remember, there should be some some nice long breaks (30 minutes to an hour or more) in between sessions, in addition to the short play breaks during the sessions. Of course, it could take considerable time to build to this, beginning with very short sessions of five minutes or less and building very gradually over a period of weeks or months.
Some children will get too bored and frustrated if asked to pay attention for a long time, even if you increase the length of the sessions very gradually. If you try to make them sit and do learning activities for too long a time, their behavior may get worse and learning will be very slow. So you must judge your child’s ability to pay attention and ask of her only what you think she is ready to do.
We also understand that you are not a professional teacher; you probably have many other responsibilities throughout your day. So, even if your child does appear ready to work for three or four hours a day, you may not be able to devote this much time to teaching your child. You are the only one who can really determine the optimal amount of time that you and your child can or should spend in your learning sessions. Do what you are able to do, and what seems to best fit your child’s ability to pay attention and learn.
Try to present the new item 4-6 times out of every 10 trials, leaving 1 or 2 trials each for the mastered items. Here are some examples of good orders for sets of 10 trials of body parts. Let’s say your child has already learned tummy, nose, and foot, and you’re now teaching “head:”
Sample Order 1
Sample Order 2
Sample Order 3
Tummy
Nose
Head
Head
Foot
Head
Head
Head
Head
Foot
Nose
Foot
Nose
Tummy
Nose
Head
Head
Head
Nose
Foot
Foot
Head
Tummy
Head
Head
Head
Head
Foot
Head
Tummy
And remember that you really only need to keep track of how well your child is doing learning the new item, in this case “head,” because he should already know the others. Of course, as your child learns more and more items, he will have fewer opportunities to practice any of the ones he’s already mastered. That’s because you’ll still need to make sure he practices the new item at least 4 times in each set of 10 trials, leaving only 6 of the 10 trials at most to practice more and more mastered items, but that’s OK. Just make sure that you practice each of the mastered items at least once every day, being on the lookout for any mistakes he might make. In the following clip, a little boy is learning “elbow”. He has already learned most of the other common body parts so his teacher is presenting “elbow” mixed in with the other body parts he has learned in an unpredictable order. She is doing more trials of “elbow” than any of the other body parts. However, she is still able to practice many of the other body parts the child has learned while teaching him the new body part: elbow.
You can also do extra sets of maintenance trials just to practice mastered body parts so that your child doesn’t lose them. And, if you see that he’s beginning to make errors on a body part that you thought he had learned well, simply treat it as you would a new body part, presenting it at least 4 times out of every 10, prompting as needed and fading your prompts as you go along. Eventually, he’ll learn it again.
There is a great deal more language that you can teach your child. There are many excellent books on the market where you can find additional teaching programs and methods. We recommend the book “A Work in Progress; Behavior Management Strategies and a Curriculum for Intensive Behavioral Treatment of Autism” by Ron Leaf & John McEachin. That book contains a treasure trove of ideas for how to teach many different language skills including much of what we have covered here and also a great deal of descriptive language including adjectives like big and small, hot and cold, etc., the functions of objects (such as scissors are for cutting; a stove is for cooking, a cup is for drinking, etc.) prepositions (on, under, beside, etc.) and more. It also contains ideas for how to teach pronouns, the language of emotions, verb tense, and many, many other important skills. There are also recommendations for teaching play skills and early academic skills. The Work in Progress series now also has a “Companion Series” with DVD’s that show video examples of how to teach many of these skills. We recommend that you explore this series to build upon the skills you have learned thus far with this program.
It is better to work on teaching your child to use this general “sentence frame’” (Person’s name IS action word) rather than teaching him to memorize individual pictures. For this reason, you will be keeping track of whether or not your child needed prompts for the set of 6 pictures. It doesn’t matter which pictures he needed help with and which he was able to do on his own. So, for example, if you do 10 trials, 3 of Mommy eating, 2 of Daddy reading, 2 of Daddy eating, and 1 of Mommy drinking, and your child needs help on 9 of the trials and does 1 all by himself, you would record that he was independent and correct 1/10 times or 10%. You don’t need to specify which pictures in the grouping were correct and independent and which he needed help with. Just rotate through the pictures and keep track of how many times in each set of 10 trials your child is able to make a sentence to describe the picture, all by himself. For a while, you can expect that you will need to help him most of the time.
Do not worry about adding the object of the action. For example, in this case, you would not worry about having your child add the word “apple” for the time being. You can work on expanding the sentences once your child has the basic idea down first. Of course, if he adds it in spontaneously, praise him enthusiastically.
Fading Your Prompts
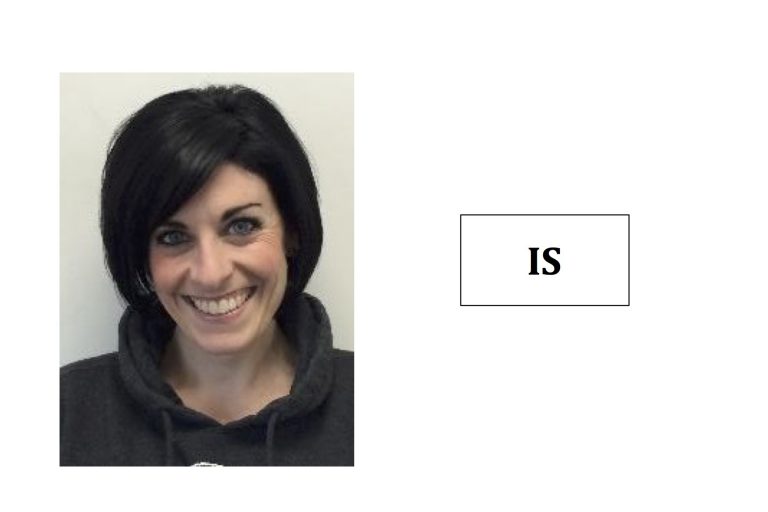
Once your child can say the sentence without any prompting, begin to eliminate one picture prompt at a time. For example, in this case you could begin by just continuing to hold up the picture of Mommy eating the apple in front of your child, instead of placing it on the table, to the right of the “is” card. Ask your child to tell you what’s happening. Then point to the other pictures, just as you did before, and when you get to the space after the “IS” card, just point to the empty space.
Wait for a second or two and if your child does not say the word “eating,” prompt him to do so using a verbal imitation prompt. You can do this a couple of times in a row, fading your prompts across successive trials.
Another idea, instead of leaving the space for the action-word blank, is to put an underline or a large dot there to show that there is a missing word. Either way, you may still need to go back to giving a verbal model for a few trials when you begin to fade the pictures. That’s OK.
In any case, point to the space, the underline, or the dot when it is time for him to label the action-word and see if he fills it in. If he does not, just prompt him using a verbal imitation prompt. Give him as much help as he needs and fade your prompts gradually, over time. Once your child is saying all three words by himself with the action-word picture removed, you should eliminate the other picture so that only the word “IS” remains as a visual prompt.
Of course, you could add underlines or dots to show where the words belong if you like.
The last prompt to fade is the “IS” card. At that point, simply hold up the picture and ask your child, “What’s happening?” Use verbal imitation prompts as needed. In the next clip, watch how the teacher fades all of the text prompts, one at a time, until the little boy is making the sentence all by himself.
Once you get to the point where you are holding up any of your pictures of familiar people doing a single action, and your child is able to tell you what’s happening in all of the pictures without any picture prompts, you should stop asking the question, “What’s happening?” on every trial. You should ask occasionally, but most of the time, just hold the picture up in front of your child and give him an expectant look.
If your child doesn’t respond when you just hold up the pictures without asking, “What’s happening?”, use a partial verbal model prompt, for example, you could say, “Mommy is” or even just “Mooommmmmmy”, holding out the sounds and using a rising tone to let him know that there is more to say and that he should be the one to say it.
Here’s another way to practice mastered sentence structure pictures.
Remember, you do not need to keep track of individual pictures or even individual people or actions. Instead you should be keeping track of how independent your child becomes with the process. You can do this by scoring a “P” if your child requires one or more prompts (visual prompts, verbal prompts or both) to make a sentence that describes the picture and “+” if he does it by himself, without your verbal model and without any visual prompts (like the pictures, the “Is” card, the dots, etc.).