Here is some more detailed information about ways to track behavior and mastery.
You can also make up a simple record-keeping form. Here is one type of simple record-keeping form. Using this form, you would just circle either +, P or –.
| Date | Circle One |
| Trial # | |
|---|---|
| 1 | + P – |
| 2 | + P – |
| 3 | + P – |
| 4 | + P – |
| 5 | + P – |
| 6 | + P – |
| 7 | + P – |
| 8 | + P – |
| 9 | + P – |
| 10 | + P – |
| Percent Correct |
Here’s another idea. Using the following record-keeping form, you simply write in +, P or –
| Date | Score |
| Trial # | +, P, or – |
|---|---|
| 1 | |
| 2 | |
| 3 | |
| 4 | |
| 5 | |
| 6 | |
| 7 | |
| 8 | |
| 9 | |
| 10 | |
| # Correct |
You could use whichever type of form seems easiest to you.
Keeping track of your child’s learning, and knowing when she has mastered a skill, is the best way to know whether or not it is time to move on and add a new skill or a next step. Without any data, it is difficult to be sure whether or not a child has mastered a skill. Finding a friend or relative to help out, or trying to track your child’s progress by yourself, will help you make good decisions about whether or not your child is ready to move on to the next step. Doing this even one or two times per week for each of the new skills you are teaching may be good enough record-keeping to make good decisions about your teaching. It’s certainly better than not doing it at all.
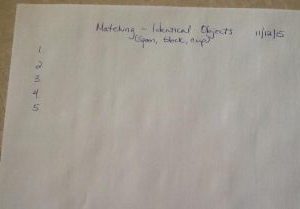
Let’s practice for a few minutes now. Please get a piece of paper and a pencil. When you have your paper and pencil, write the numbers 1 to 5 down the left hand-side of the paper like this.
1.
2.
3.
4.
5.
We’re going to show you a series of 5 learning trials for teaching matching of identical objects so you should right “Matching – Identical Objects” at the top of the sheet of paper. And just to get into the habit, you should add today’s date near the top of the page as well. Keeping track of your special learning session dates is a good thing to do. If you are working with a Board Certified Behavior Analyst (BCBA) he or she will want to graph your child’s data by date for each teaching program. This makes it very easy to see at a glance how well your child is learning.
Even if you do not the graph the data, you should try to keep it in a file or binder by date. Keep the data for each teaching program in a separate section. That way, you can look back and see how your child did at various points in time learning new skills.
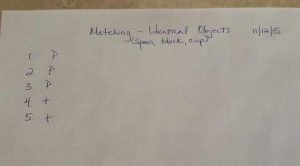
Now we’re going to show you a video clip of 5 learning trials. See if you can record a plus sign (+) for correct, a minus sign (–) for incorrect or no response, or a “P for prompt” next to the number for each learning trial.
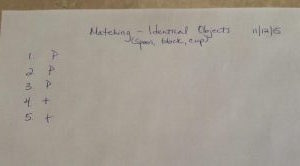
Here’s how this data would look on the handwritten data sheet we showed you above.
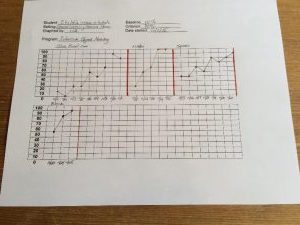
Here’s how it would be recorded on the record-keeping charts we showed you.
Matching Identical Objects
(Spoon, block, and Cup)
| Date: 11/12/15 | Score |
| Trial # | +, P, or – |
|---|---|
| 1 | P |
| 2 | P |
| 3 | P |
| 4 | + |
| 5 | + |
| 6 | |
| 7 | |
| 8 | |
| 9 | |
| 10 | |
| Percent Correct | 2/5 or 40% |
Here’s how it would be recorded on the record-keeping charts we showed you.
Matching Identical Objects
(Spoon, block, and Cup)
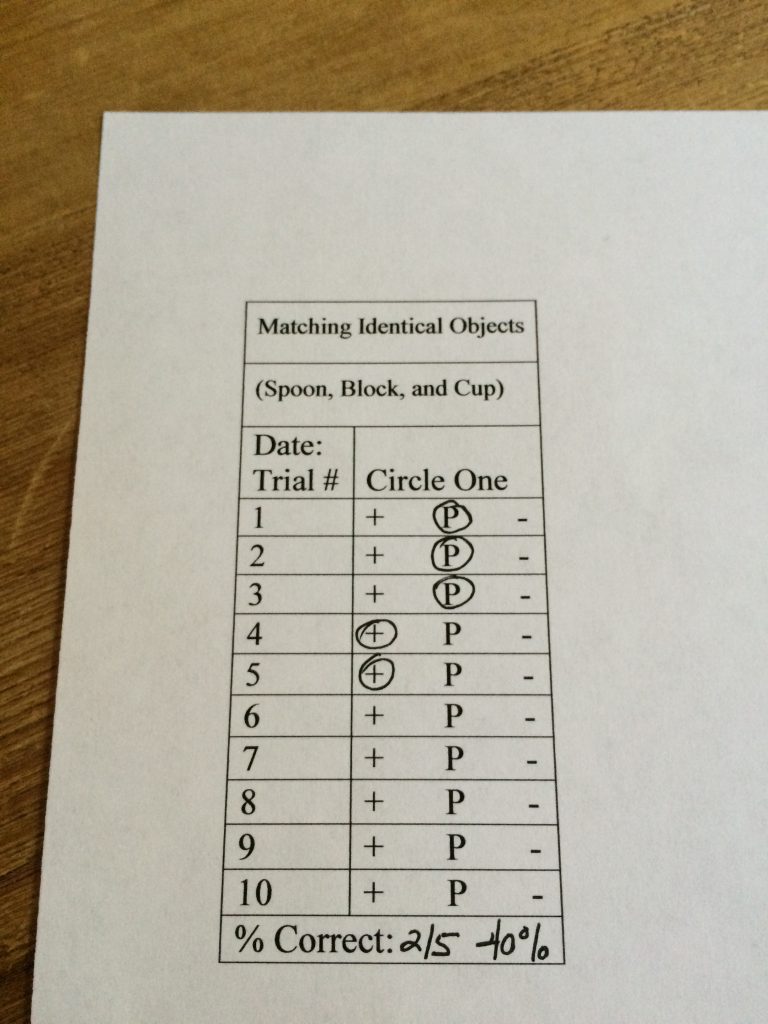
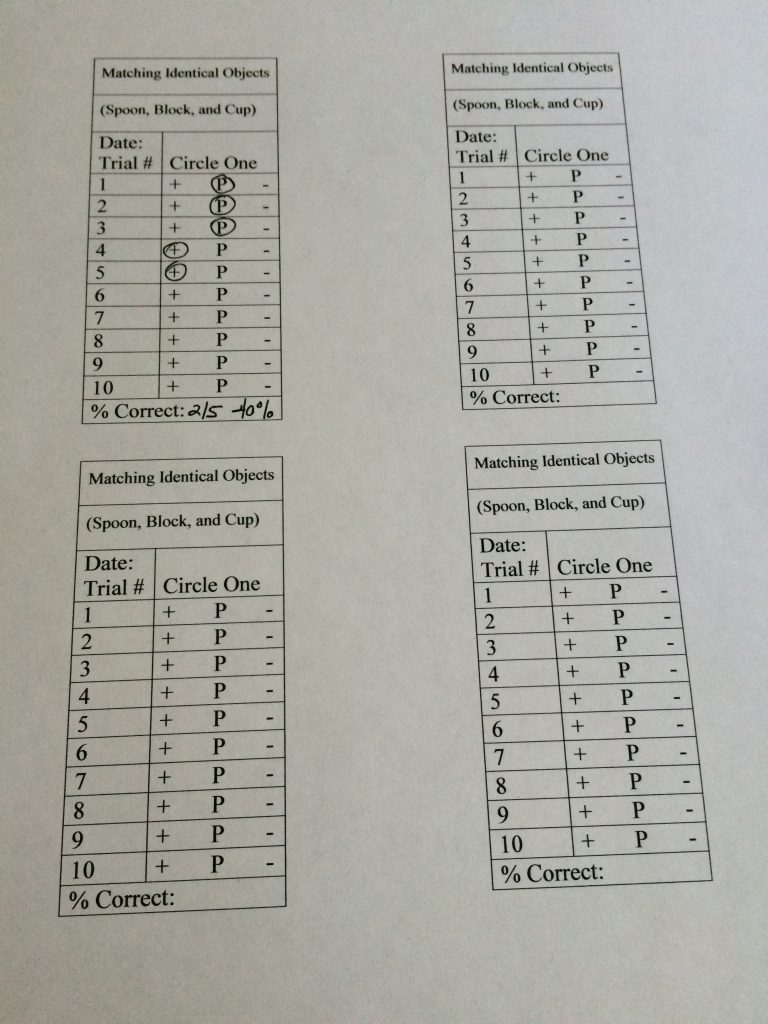
The percent (%) correct equals the number of trials scored with a plus sign (+) in this case 2, divided by the total number of trials presented (in this case 5) so 2 / 5 = .4 or 40%. If the child had scored a plus sign on 3 out of the 5 trials, she would have been 60% correct, 4 out of 5 would be 80% correct and if she had responded correctly, and without any help, on all 5 trials, you would have a % correct score of 5/5 or 100%.
Now let’s say that after two or three weeks, your child is consistently matching identical spoons, blocks and cups correctly, at least 8 times out of every 10 trials, when presented in an unpredictable order. At that time, you could say that your child has mastered identical object matching for spoons, blocks and cups up at the 80% mastery criterion you set for her. Once your child is scoring at the mastery criterion you have set for her and she does so at least 3 times in a row over a period of at least 2 days, you would be ready to add a fourth pair of matched objects into the mix. It would be a good idea to start a list for the mastered items in each teaching program. For example, you would write:
Matching Identical Objects
Mastered Items
Spoons
Blocks
Cups
Once your child has mastered his first set of three items, you would then add another item, for example, “cars.” In this case, your new record-keeping form for the teaching program called, Matching Identical Objects, would look like this.
Matching Identical Objects
(Cars)
| Date: | Score |
| Trial # | +, P, or – |
|---|---|
| 1 | |
| 2 | |
| 3 | |
| 4 | |
| 5 | |
| 6 | |
| 7 | |
| 8 | |
| 9 | |
| 10 | |
| Percent Correct | 2/5 or 40% |
Even though you would be asking your child to match identical pairs of spoons, blocks, cups and cars, you would only need to keep careful track of the new one, “cars.” And, of course, in the beginning, we would expect that most of the “match cars” trials would be prompted, while most, if not all, of the spoon, block and cup trials would be independent and correct. Since you wouldn’t need to record your child’s performance on spoons, blocks, and cups, his record-keeping chart might look something like this:
Matching Identical Objects
(Cars)
| Date: 11/12/15 | Score |
| Trial # | +, P, or – |
|---|---|
| 1 | P |
| 2 | P |
| 3 | – |
| 4 | P |
| 5 | P |
| 6 | + |
| 7 | |
| 8 | |
| 9 | |
| 10 | |
| Percent Correct | 1/6 or 17% |
This record-keeping chart tells you that you worked on the teaching program for Matching Identical Objects on November 12, 2015. You would know that your child’s new object pair to match was a pair of cars and that she was prompted 4 out of the 6 times that you practiced this match. By looking at this data sheet, you would also have a list of the mastered items in this teaching program, you would know that “match cars” was not really presented six times in a row, by itself. Instead, you would understand that “match cars” was presented along with the other three mastered items (spoons, blocks and cups) in an unpredictable order.
Although you would not know exactly how many trials of matching your child did altogether during that sitting, you would know that she failed to match the pair of cars correctly on the first probe (test trial) but that she matched the pair of cars correctly the second time you withheld your prompt. And, by the way, if your child makes an error on the very last trial of a set of trials, you should add one more trial and prompt it to be sure the trial set for that teaching program ends on a positive note. Her percent correct is 16.66 percent but we would round that to 17%.
You would continue to keep track of your child’s performance on “match cars” until he was doing this correctly at least 8 times out of every 10 trials, at which point, you could add cars to the list of mastered items in the teaching program called, Matching Identical Objects.
Matching Identical Objects
Mastered Items
Spoons
Blocks
Cups
Cars
Then you would add another new item and you would keep track of your child’s performance on that new item, and so on.
Now let’s try to practice record-keeping again. Watch the following clip of the same child learning to follow a new instruction, “walk around chair.” This child has already mastered clap and arms up and responds correctly when given those instructions nearly 100% of the time. He is learning his new instruction, mixed in with trials of the previously mastered instructions (clap and arms up). So remember, you only need to take data on trials of the new instruction (walk around chair).
Begin by writing the numbers 1-10 down the left side of your piece of paper and write “Following Instructions” (walk around chair) and today’s date across the top. Then watch the following clip and write a P, + or – for each trial of ‘walk around chair’.
Here’s how the scores would look if you had recorded them on a record-keeping chart.
Following Instructions
(Walk around chair)
| Date: xx/xx/xx | Score |
| Trial # | +, P, or – |
|---|---|
| 1 | P |
| 2 | P |
| 3 | P |
| 4 | P |
| 5 | – |
| 6 | P |
| 7 | P |
| 8 | P |
| 9 | + |
| 10 | |
| Percent Correct | 1/9 or 10% |
This record-keeping chart gives us a lot of information. It shows us that on (today’s date) there were 9 trials of “walk around chair” done in the teaching program called, Following Instructions. The first four trials were prompted. On the fifth trial, the teacher withheld the prompt to see if the child would respond correctly without help. He responded incorrectly on that trial. She then prompted three more trials of walk around chair, mixed in with his mastered instructions. On the ninth trial, she probed again (withheld her prompt) and he scored correctly. Ending on a positive note, she stopped there. So, altogether, for that set of trials, there were 9 trials of ‘walk around chair’ and 1 out of the 9 trials was independent and correct so he was approximately 10% correct.
How accurate were you with your record-keeping? Did you score the learning trials the same way? If not, you might want to go back over this part a couple of times before moving on.
Making up your record-keeping charts (data sheets) ahead of time will make it easier to record your child’s progress. As you have seen, data sheets can be very simple and easy to make. It really is a good idea to try to keep track of your child’s responses for each skill you are working on with her as often as you can, even if that’s only one or two times per week.